We are going to install Synology in this sickchill tutorial. Install SickChill on a Synology Nas. So you’re automatically. Download tvshows from the newsgroups.
There is a small chance that you cannot find and install SickChill using the method below. Then it may be that your Synology device is not supported. You can always use the SickChill docker tutorial.
Add GIT and SickChill install capability

If you’re logged into your Synology page.
Then go to the Package Center.

Now go to Settings.

Select Any Publisher now.

Go to the Tablad Package Resources. Then click Add. Please enter a name .
At the location, fill in the following “http://packages.synocommunity.com/“
Click OK now. And again OK.
Should“http://packages.synocommunity.com” not be available. Then you can also use “http://synology.nzbusenet.com“.
Install Git Synology

Before we can install SickChill. Now we have to install GIT first.
Go to the Package center.

Go to Community.

Look up Git. Click Install.

You can get the question above. Then click Next.

Click Apply.
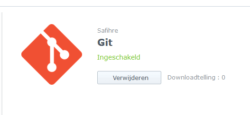
Git is now installed.

If it has gone well then you will see above.
Install Synology SickChill
Now we can actually download and install SickChill.
Go back to the Package center.

Scroll down. And now click Community.

Then look up SickChill. and then click Install.

Click next.

If all went well you will see above.
Installing the SickChill Synology tutorial It’s now time to configure SickChill.
Docker SickChill tutorial


Thanks for the guide however I am not seeing sickchill after I install git. Any ideas?